Tony Finch – blog
My Keybird69 uses LEGO in its enclosure, in an unconventional way.
story time
Two years ago I planned to make a typical acrylic sandwich case for HHKBeeb, in the style of the BBC Micro’s black and yellowish beige case. But that never happened because it was too hard to choose a place to get the acrylic cut so my spec.
My idea for using LEGO in a keyboard case was originally inspired by James Munns, who uses LEGO for mounting PCBs, including at least one keyboard.
Howver, I could not work out how to make a case that is nice and slender and into which the parts would fit. It is possible – the KBDcraft Adam solves the problem nicely, and by all reports it’s pretty good as a keyboard, not just a gimmick.
To make the PCB design easier, I am using a Waveshare RP2040-Tiny. It’s more flexible than the usual dev boards used in custom keyboards because it has a separate daughterboard for the USB socket, but I had the devil of a time working out how to make it fit with LEGO.
brainwaves
-
Instead of using LEGO for the base, use FR-4, same as the switch mounting plate;
-
There isn’t enough space for SNOT so I can’t use LEGO studs to attach both the top and bottom of the case; why not use non-LEGO fasteners instead?
-
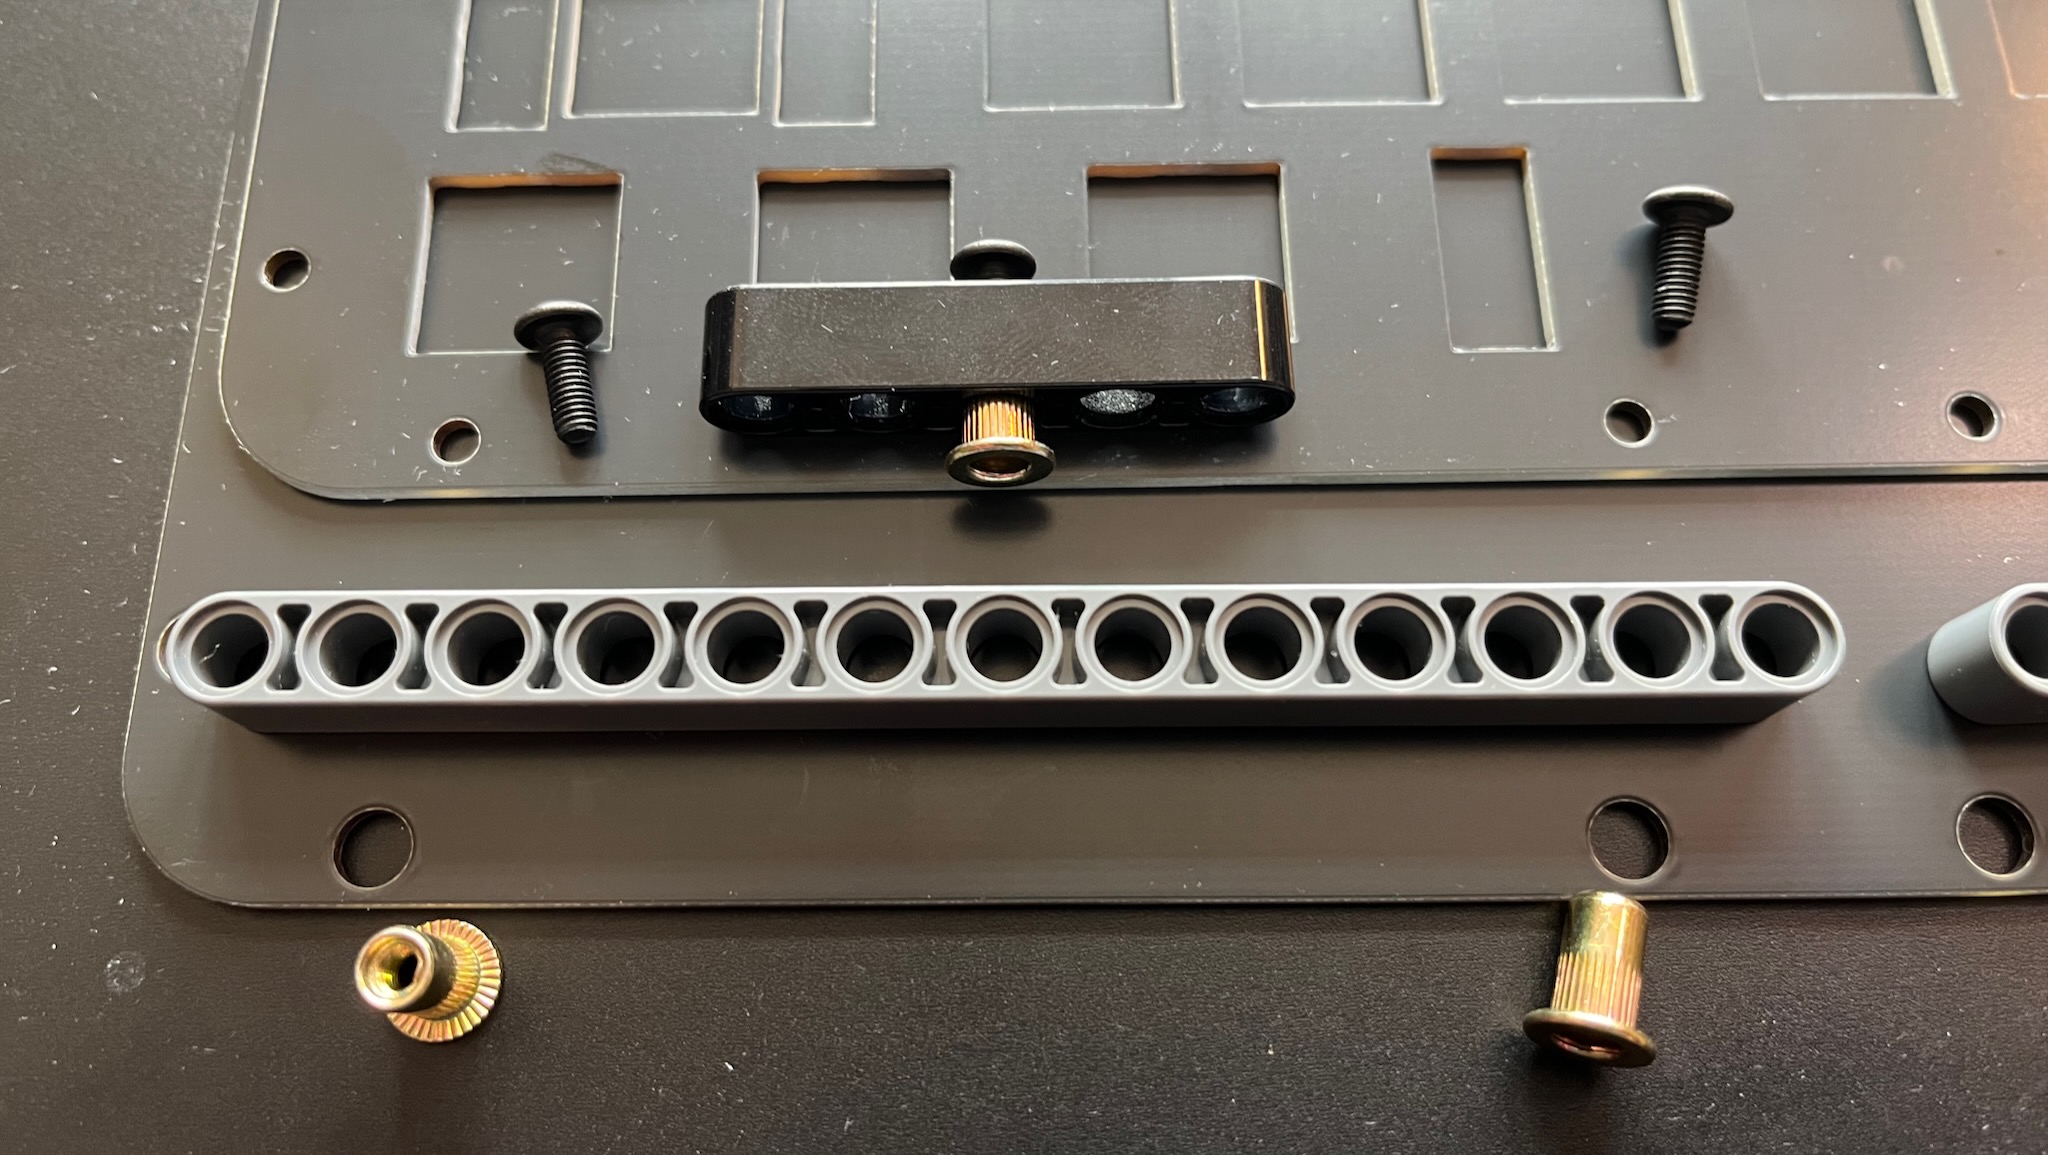
That will need through-holes, so maybe LEGO Technic beams will work?
-
Maybe the fasteners I got for the HHKBeeb case will work?
fasteners
I wanted the fasteners for the HHKBeeb case to be as flat as possble; but acrylic does not work well with countersunk screws. Instead I looked for fasteners that protrude as little as possible.
For machine screws, I found the magic phrase is “ultra thin super flat wafer head”. These typically protrude 1mm or less, whereas the more common button head or pan head protrude about 2mm or more.
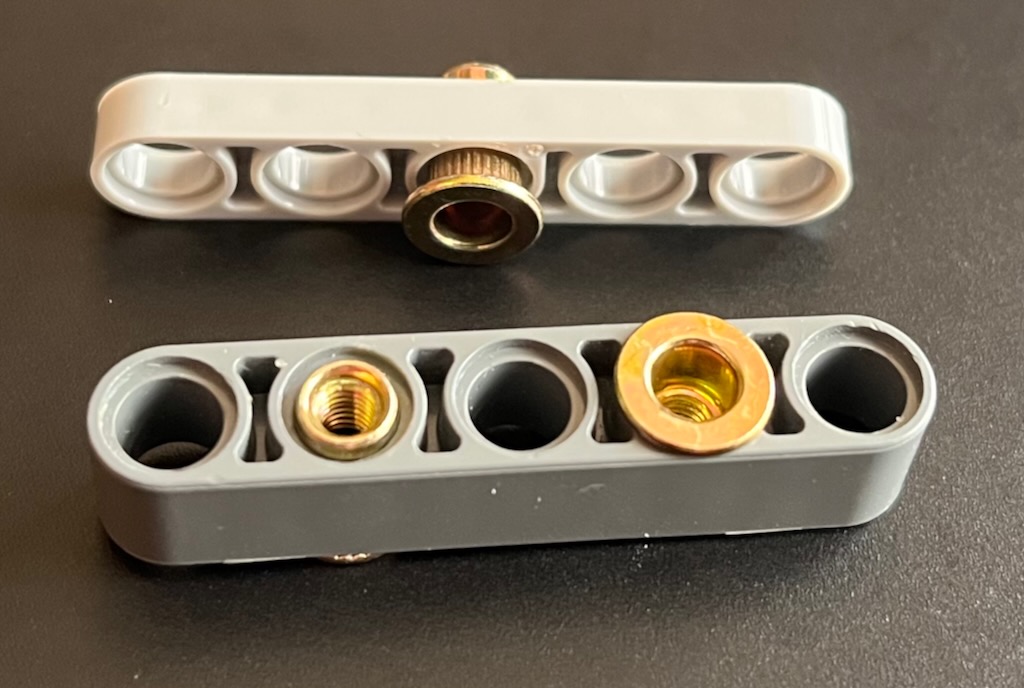
I also discovered rivet nuts. They are designed to be inserted into a sheet metal panel and squashed so that they grip the panel firmly. But I just wanted them for their thin flange, less than 1mm.
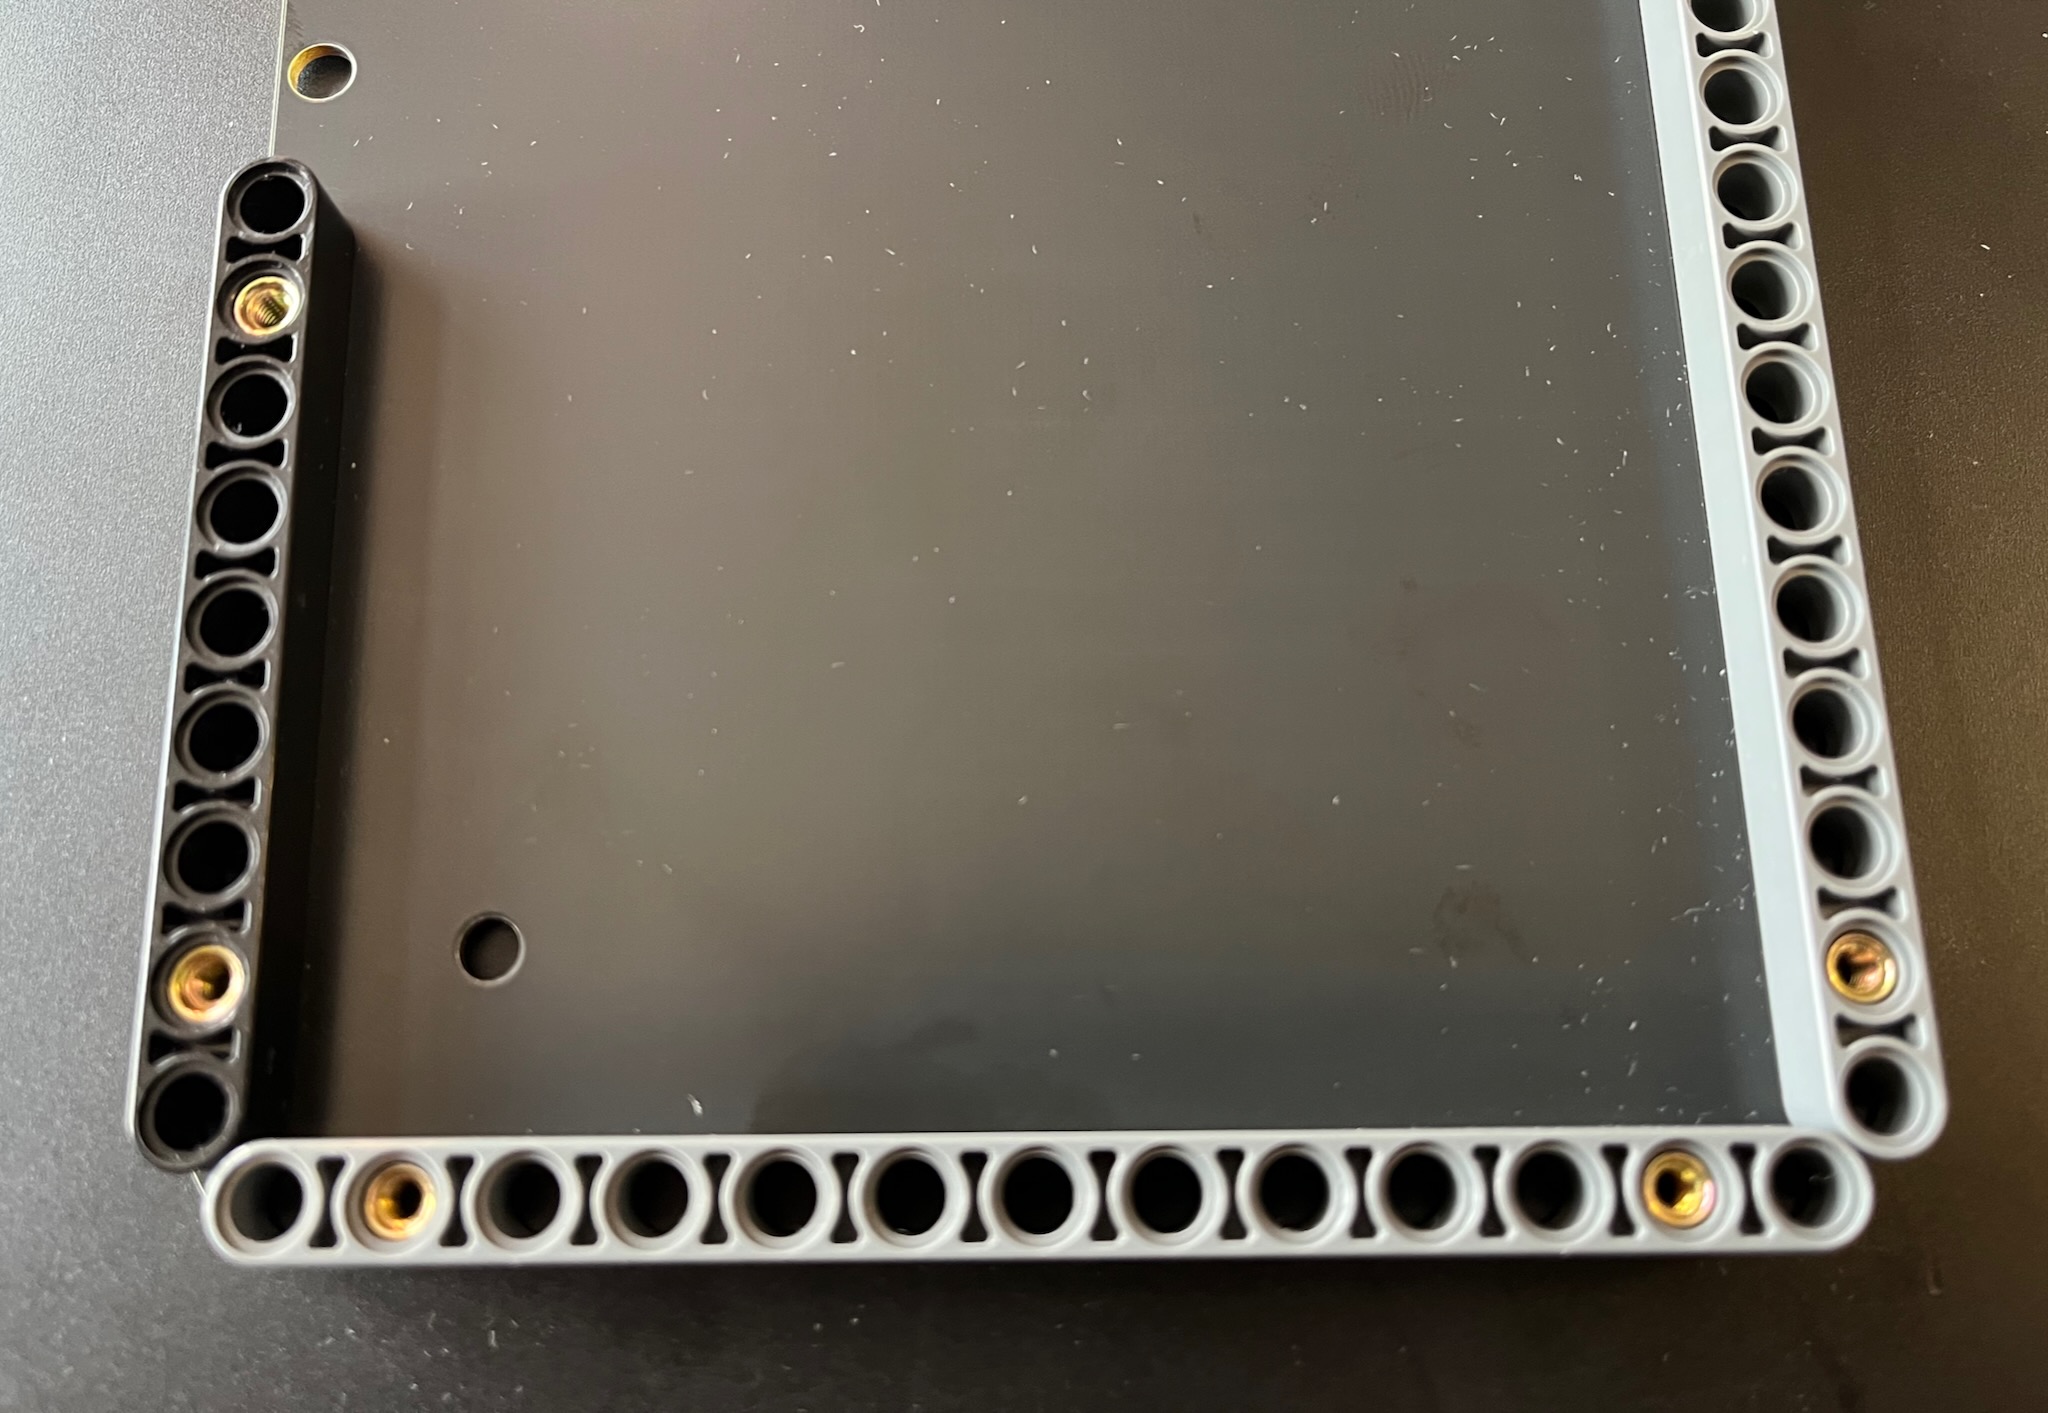
The usual fasteners for a sandwich case are machine screws inserted top and bottom, with a standoff in between. But Keybird69 uses machine screws in the top and rivet nuts in the bottom.
I’m using M3 rivet nuts and machine screws. The outer diameter of the rivet nuts is 5mm; the inner diameter of the Technic holes is 4.8mm. Fortunately the beams are made from flexible ABS, so the rivet nuts can be squeezed in and make a firm press fit. They can be pushed out again with a LEGO Brick Separator.
vertical
Many dimensions of the keyboard are determined by the Cherry MX keyswitch de-facto standard.
The switch mounting plate must be about 1.5mm – the standard PCB thickness of 1.6mm works fine.
The top of the PCB is 5mm below the top of the plate. The bottom of the PCB is also 5mm below the bottom of the plate because they are the same thickness. (Usually.)
The electronics are soldered to the bottom of the PCB.
- switch through-hole pins protrude 1.7mm
- the Kailh sockets need 1.8mm
- RP2040-Tiny needs 2.1mm
A LEGO Technic beam is 8mm high (along the length of its holes).
The bodies of the switches and the PCB use 5mm of the beam height, leaving 3mm for the electronics. Plenty of space!
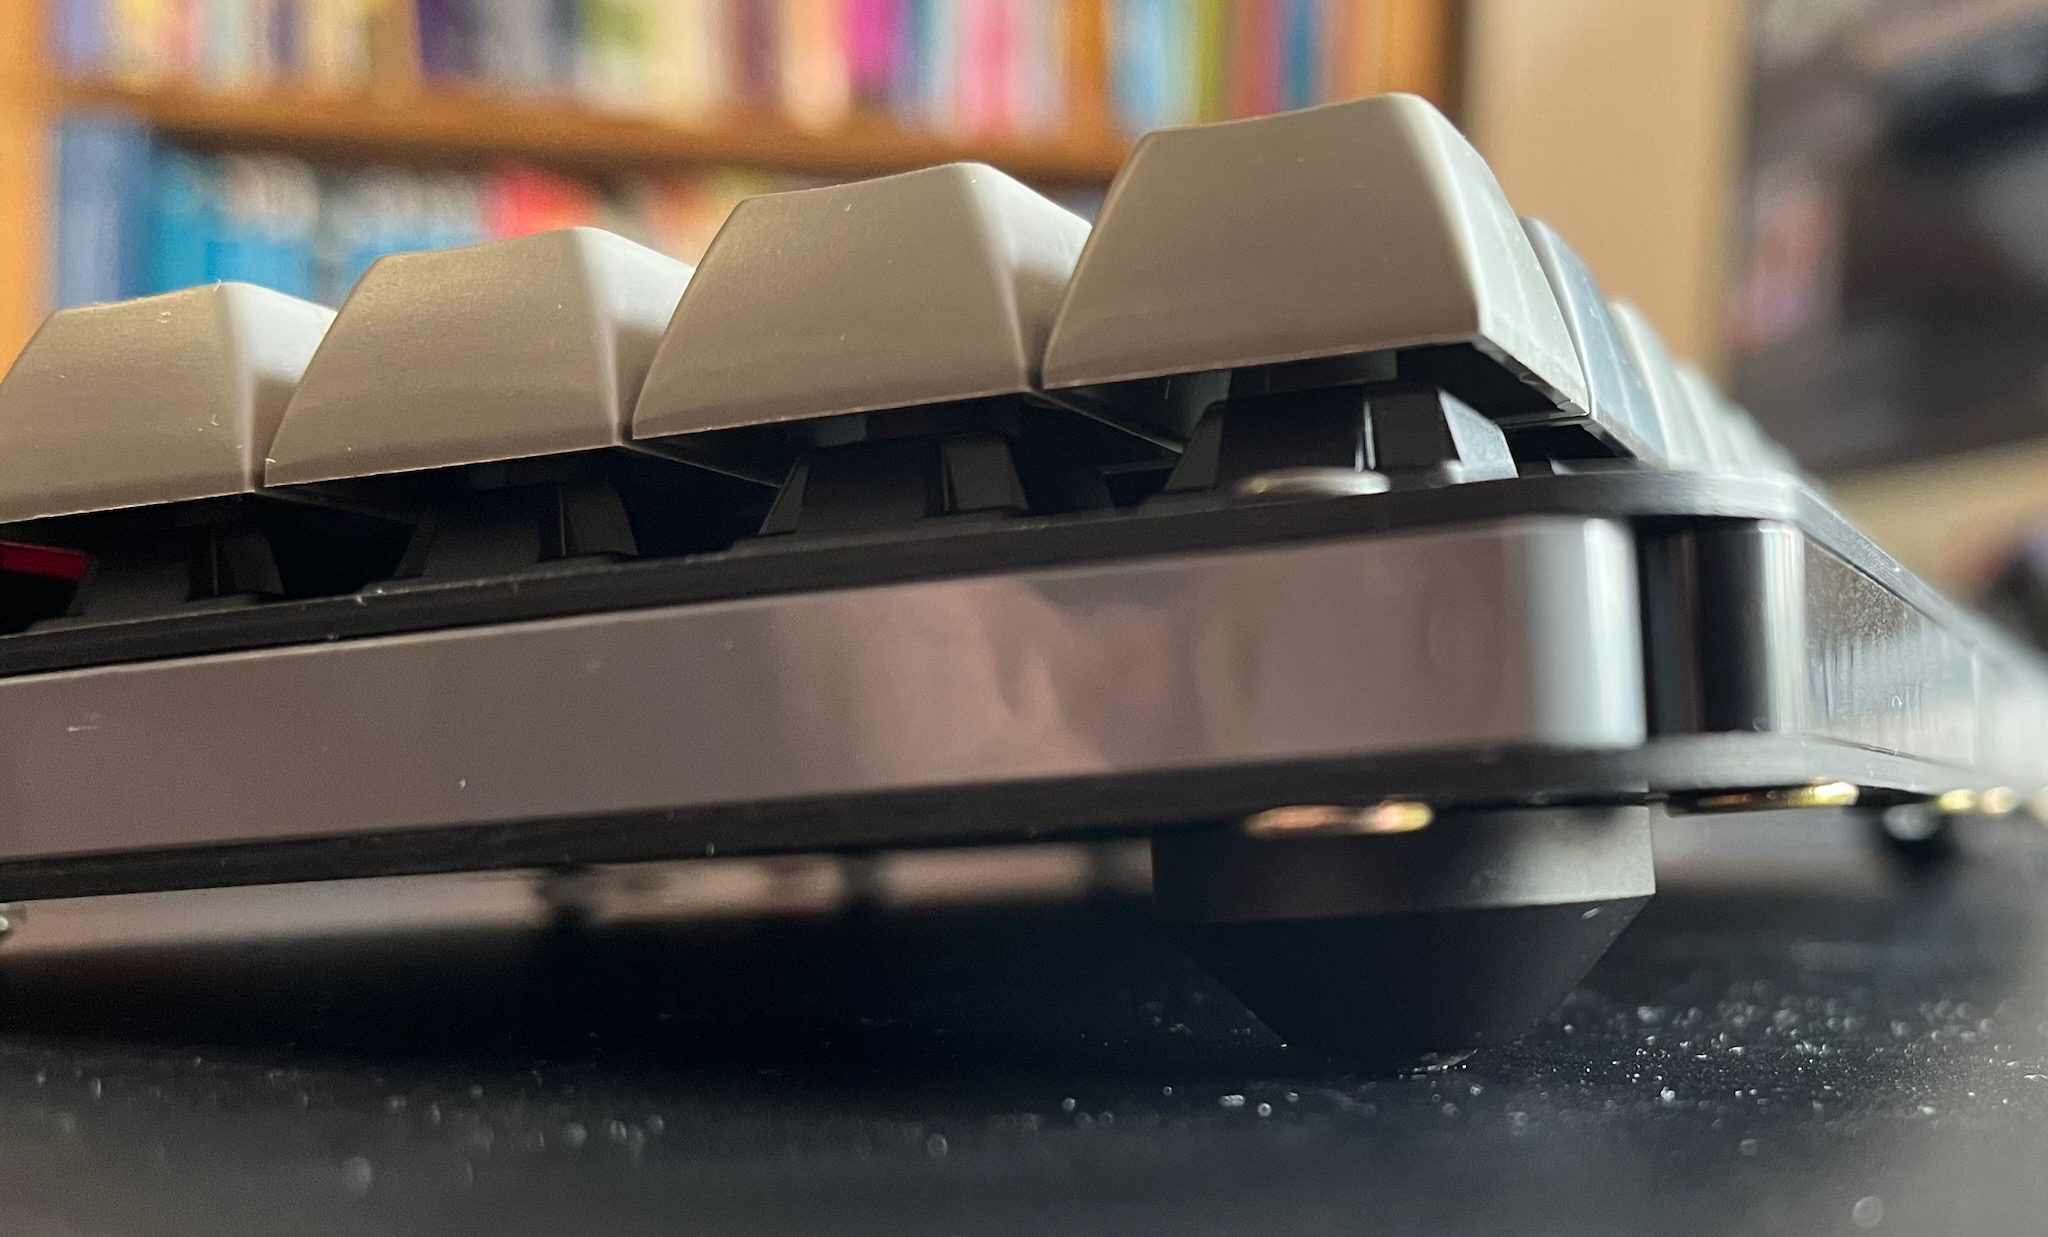
The height of the enclosure is 8 + 1.6 + 1.6 = 11.2 mm, which is pretty slender.
HHKBeeb’s generic case uses 10mm acrylic so it’s 2mm thicker, and the NightFox is about the same.
usb-c
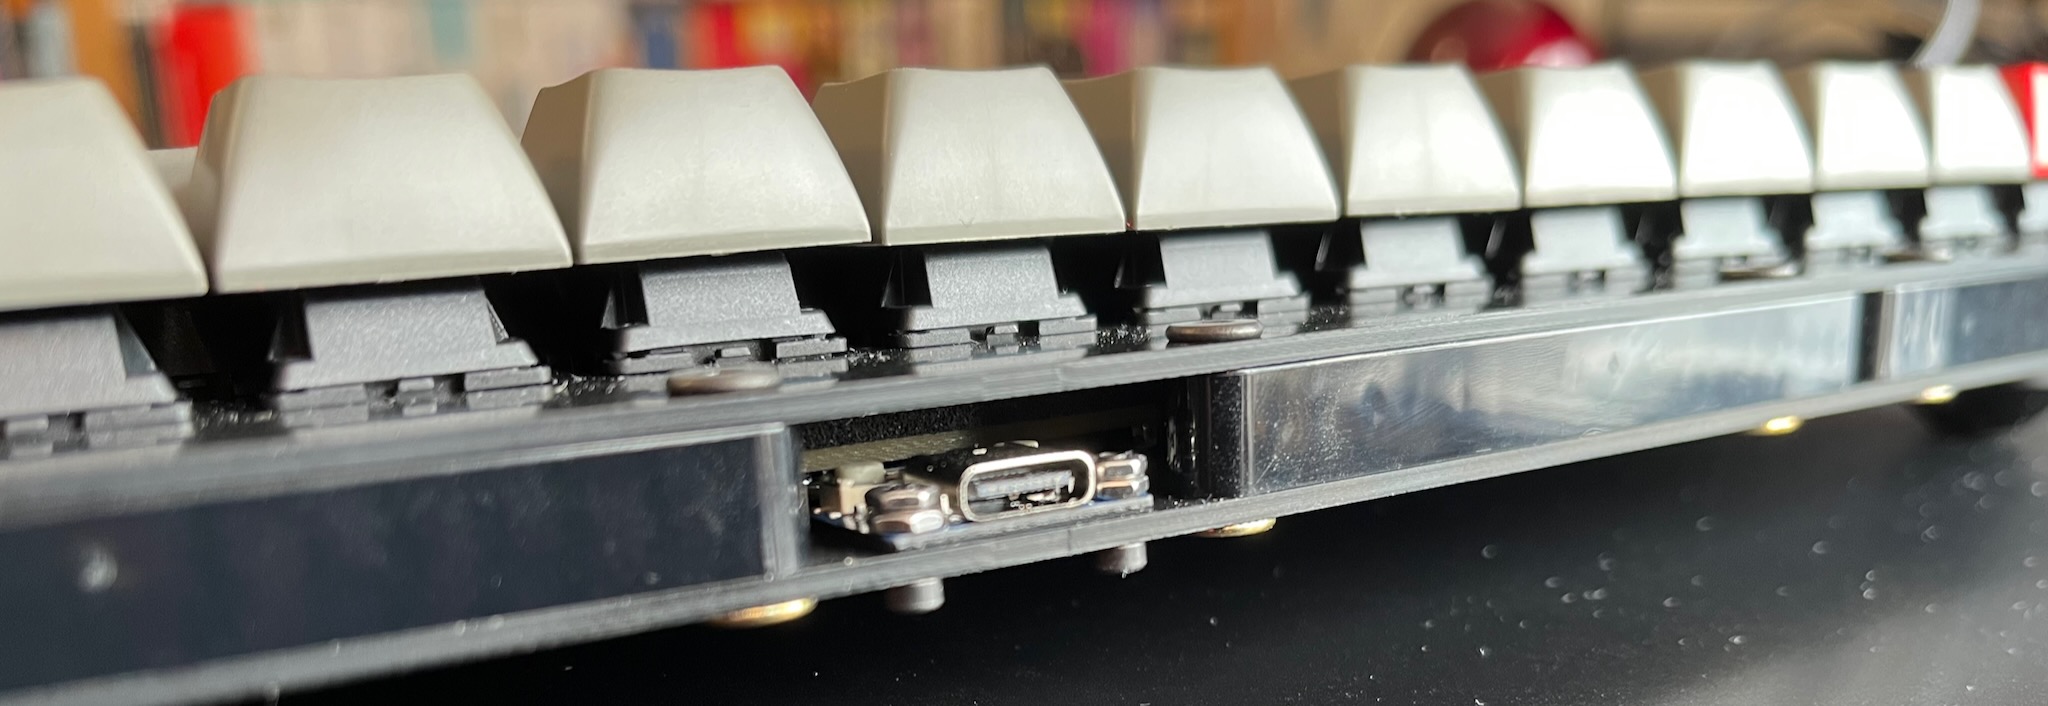
The Waveshare RP2040-Tiny daughterboard is problematic: its PCB is 1mm thick, and the USB-C receptacle is about 3.5mm high. It also has a couple of buttons for resetting or reflashing the RP2040, and they are a similar height.
I could not find a comfortable way to make space for it by cutting away part of the PCB to give it enough headroom. Then I had another brainwave!
I am not constrained by LEGO’s rectilinear grid, so I could make space by angling the back of the case outwards slightly. The middle of the back of the case has the extra few milimetres needed for the USB daughterboard.
If you look closely at the picture above, behind the USB-C receptacle and the M2 nuts, you can see the whiteish top of one of the buttons, and behind that is the beige textured edge of the PCB.
(Also, I need to turn the beams round so that the injection moulding warts are not visible!)
horizontal
LEGO studs use an 8mm grid. Keys are on a 3/4 in grid, or 19.05mm.
Keybird69 is 5 keys deep, which is slightly less than 12 LEGO studs.
It is 16 keys wide, which is slightly more than 38 LEGO studs. Three LEGO Technic 13 hole beams are 39 studs long.
The front and sides of Keybird69 are enclosed with 5 beams of 13 holes each, which stick out half a stud past the block of keys. They meet at the corners so that the tangent is 45° where the rounded ends of the beams are closest.
This arrangement leaves about 1mm clearance around the PCB. Spacious.
Technic beams are not as square in cross-section as you might expect. Their height (through the holes) is 8mm, whereas their width (across the holes) is 7.2mm. In Keybird69 I left 0.4mm gap between them – I could have cut that down to 0.2mm without problems.
finishing touches
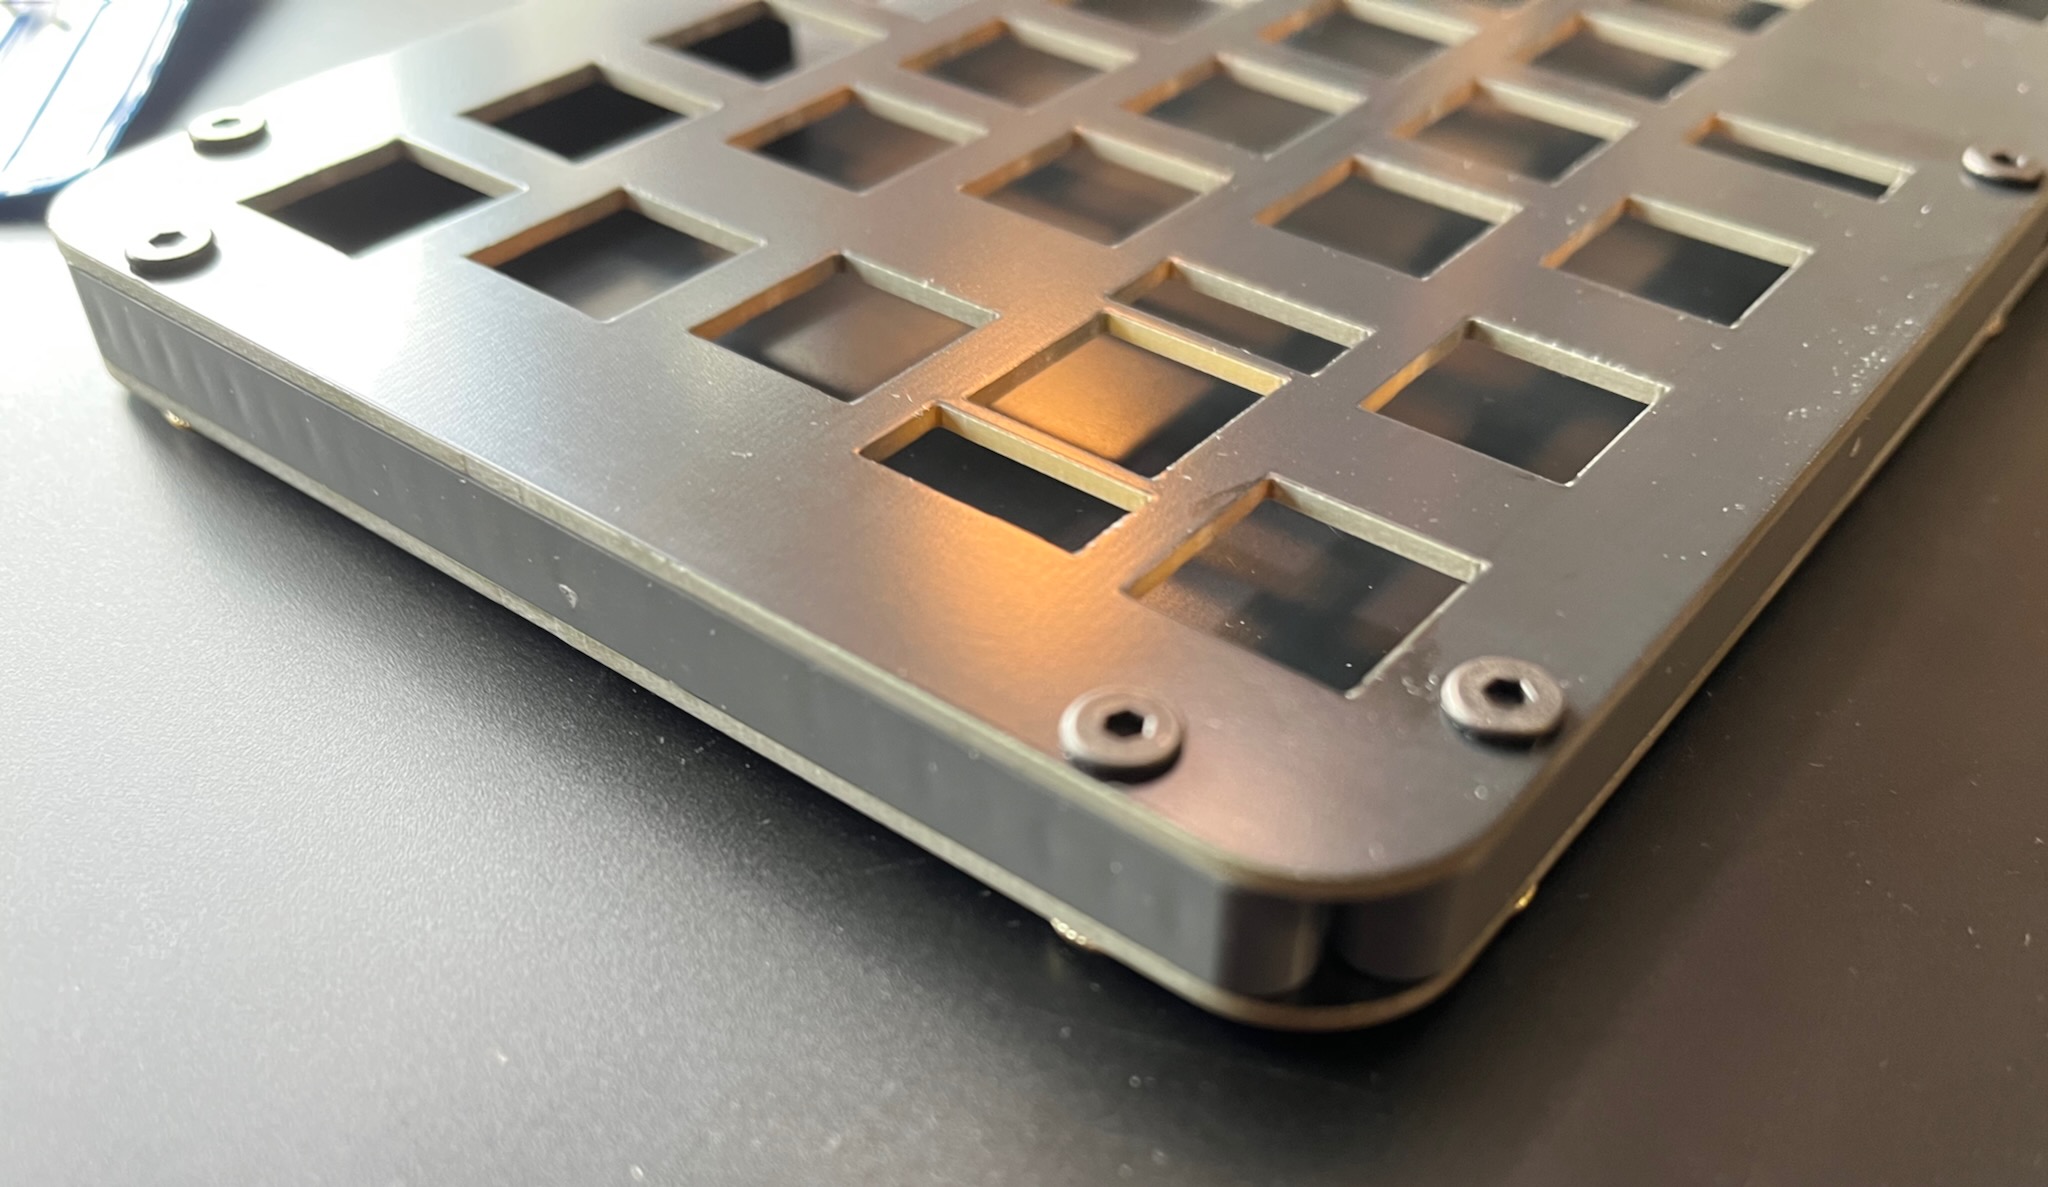
I used a 10mm radius of curvature for the corners. Apart from where the beams meet, the switch plate and base plate are very nicely flush with the beams.
I tried using a Sharpie permanent marker to blacken the edges of my Keybow 2040, but the ink did not stick very well. On Keybird69 I used an acrylic paint marker pen, which worked much better. Compare the raw fibreglass beige of the edges in the picture above to the black edges below.
One thing that probably isn’t clear from the pictures is that the FR-4 plates have an unexpectedly lovely matte reflective quality. I think it might be because the black solder mask is not completely opaque so the layer of copper underneath gives it a bit of shine.
I am also getting some black 13 hole Technic beams to replace the dark grey ones, gotta make sure the dust shows up clearly on every possible surface!