Tony Finch – blog
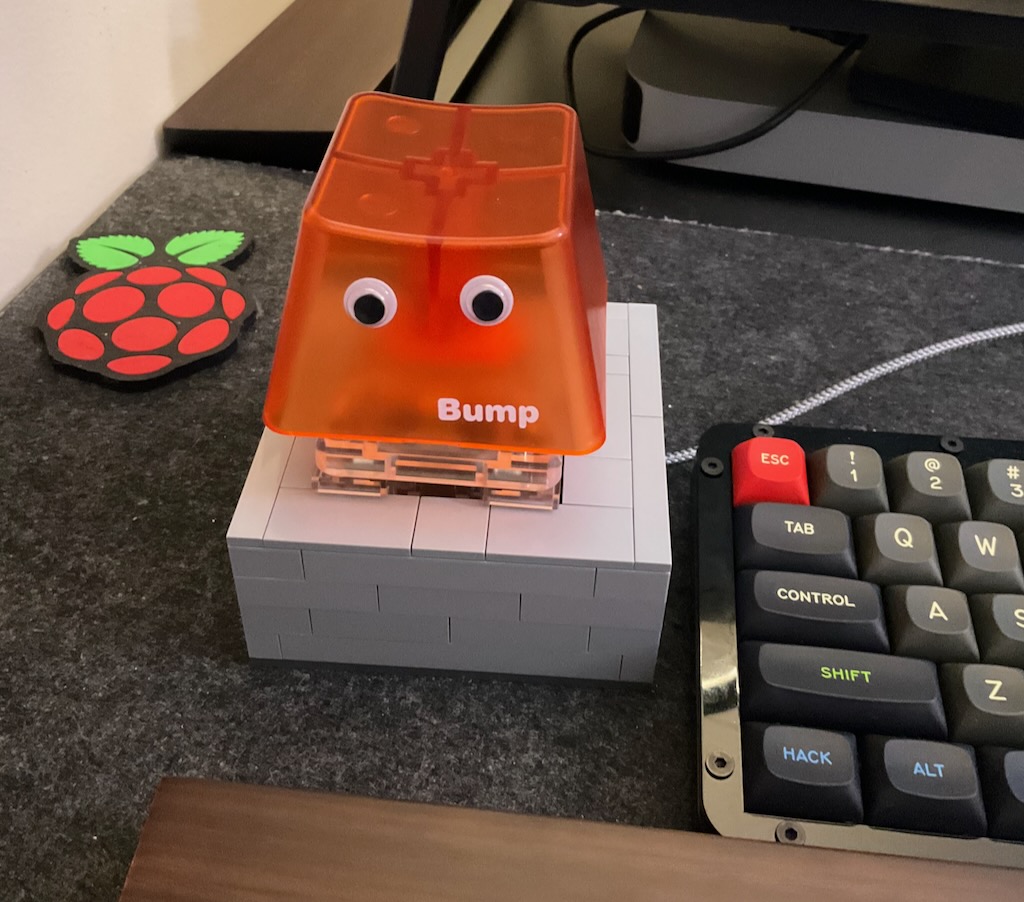
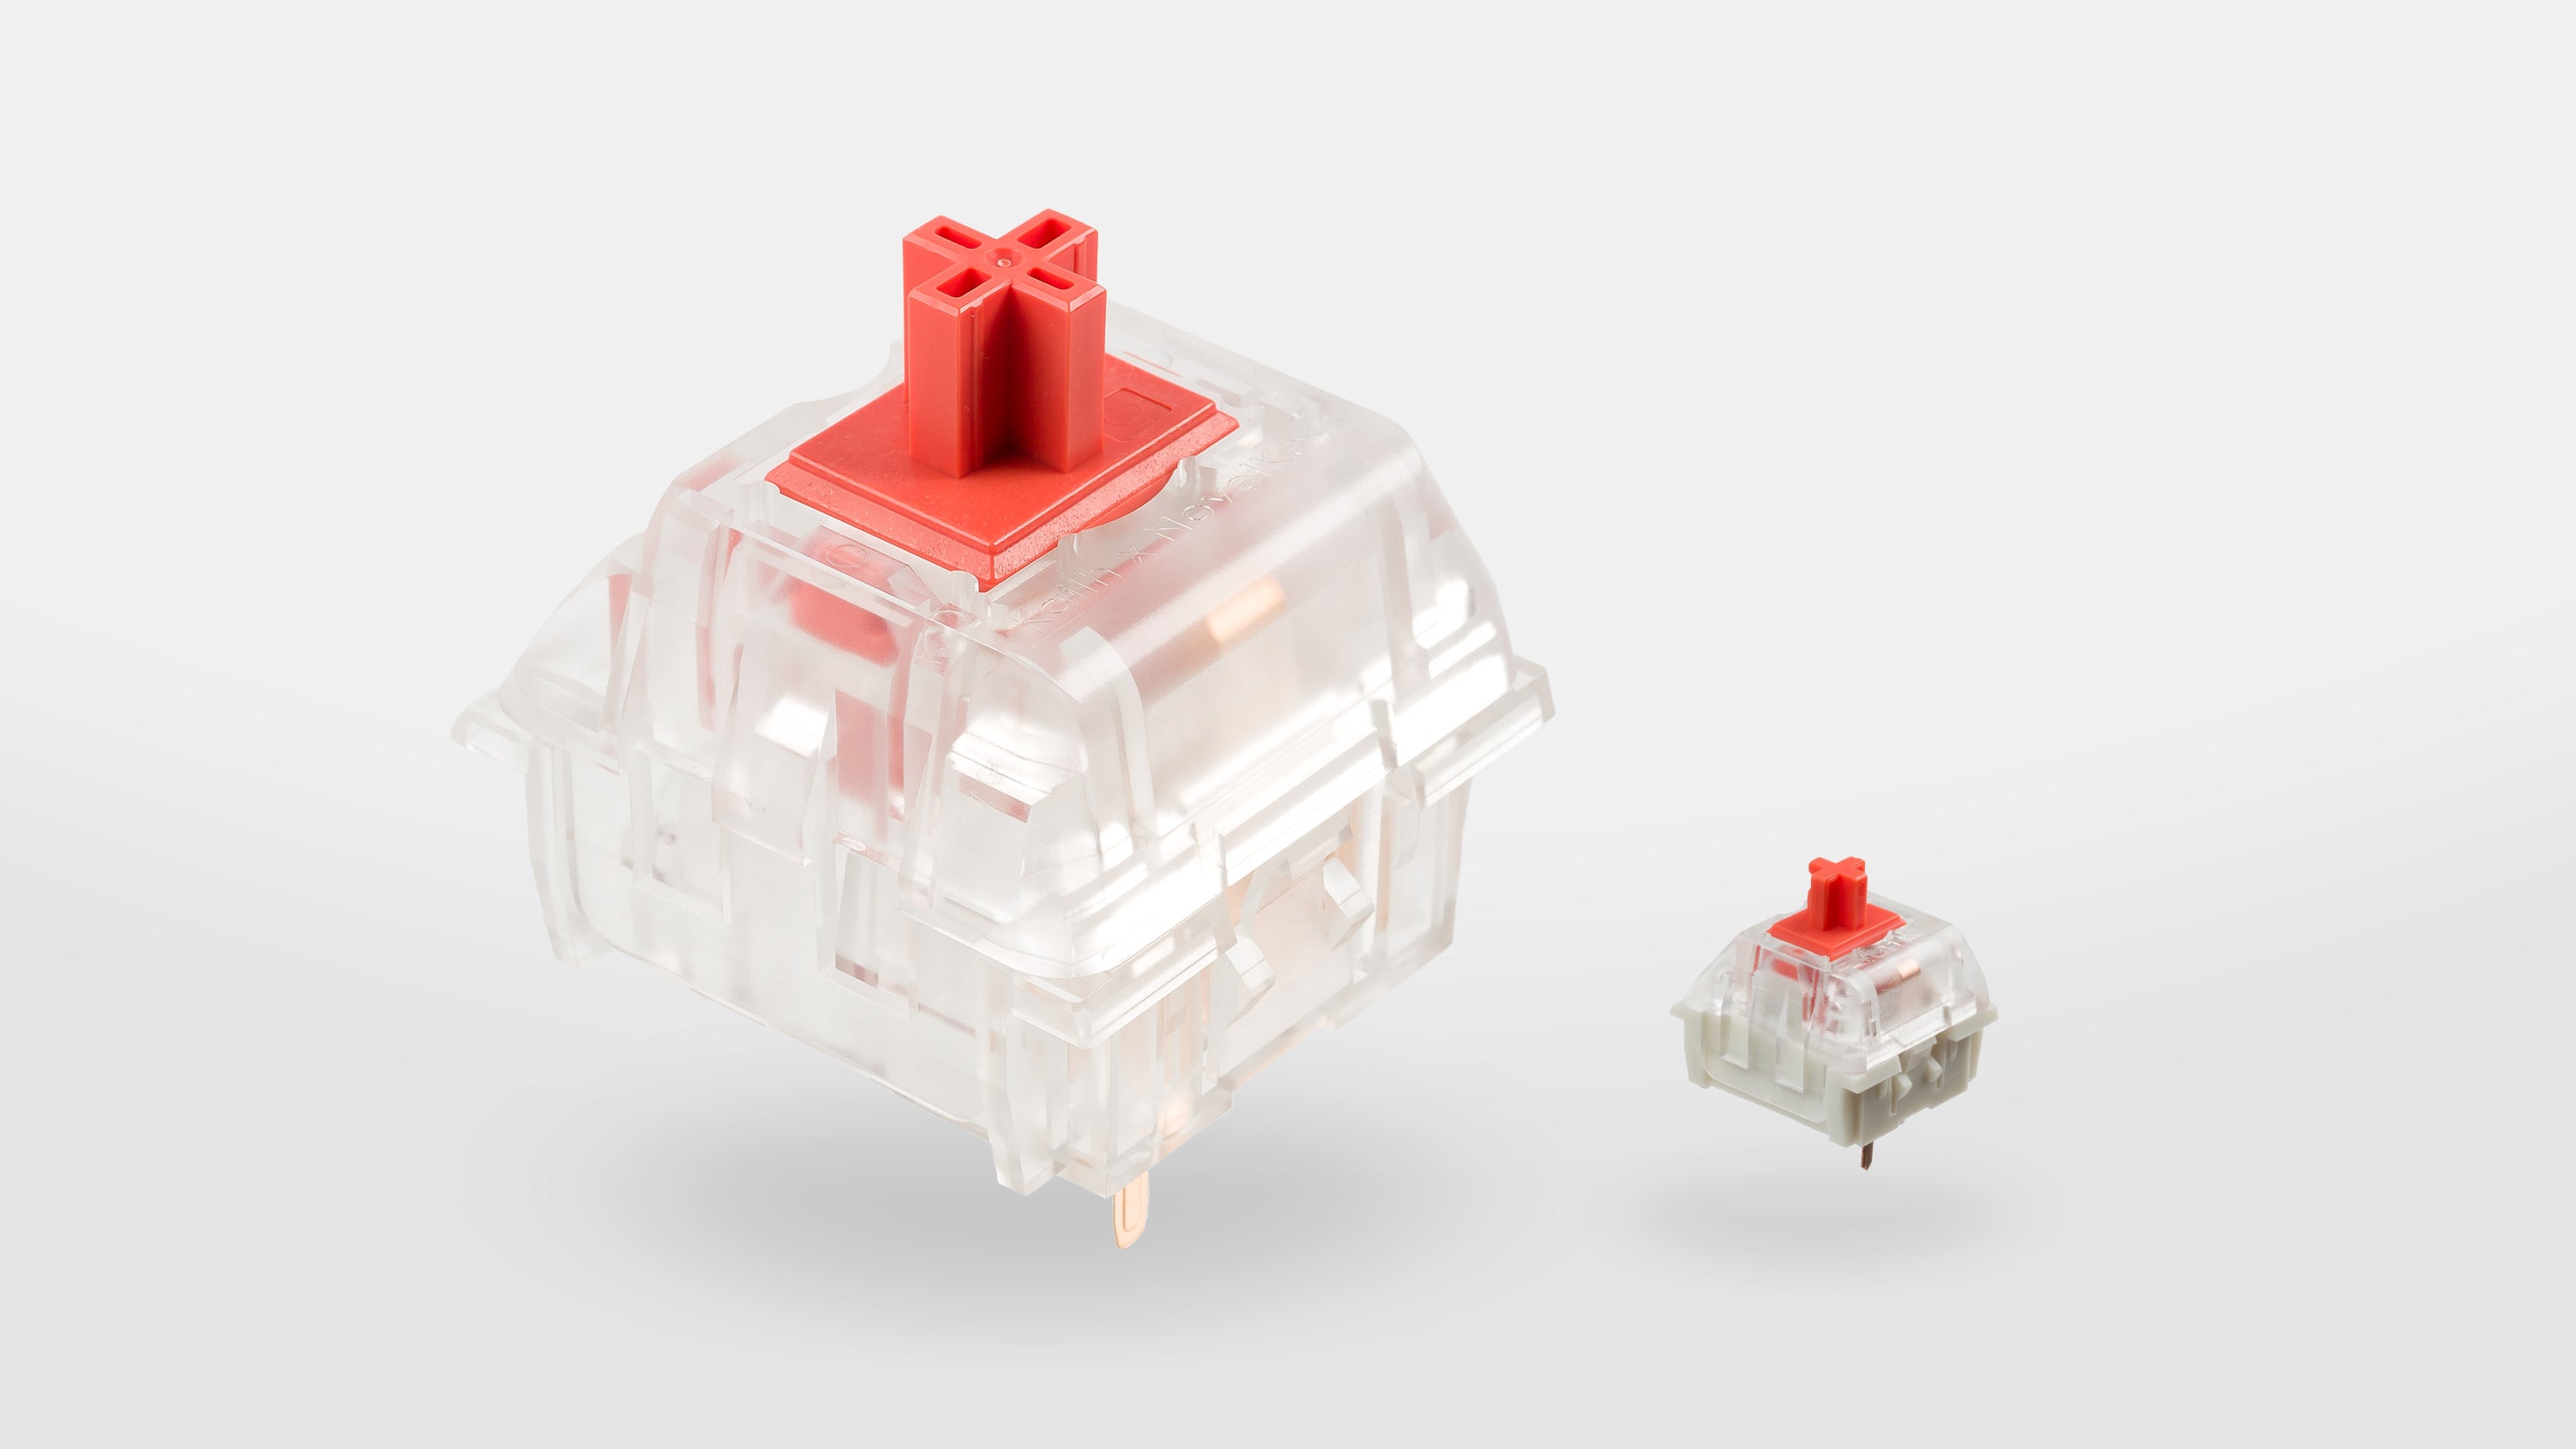
The Novelkeys Kailh Big Switch is a working MX-style mechanical keyboard switch, but 4x larger in every dimension.
I realised at the weekend that the Big Switch should fit nicely in a simple Lego enclosure. Because an MX-style switch is usually mounted in a 14x14 mm square plate cutout, at 4x larger the Big Switch would need a 56x56 mm mounting hole. Lego aficionados know that studs are arranged on an 8x8 mm grid; this means the Big Switch hole is exactly 7x7 studs. A plan was hatched and a prototype was made.
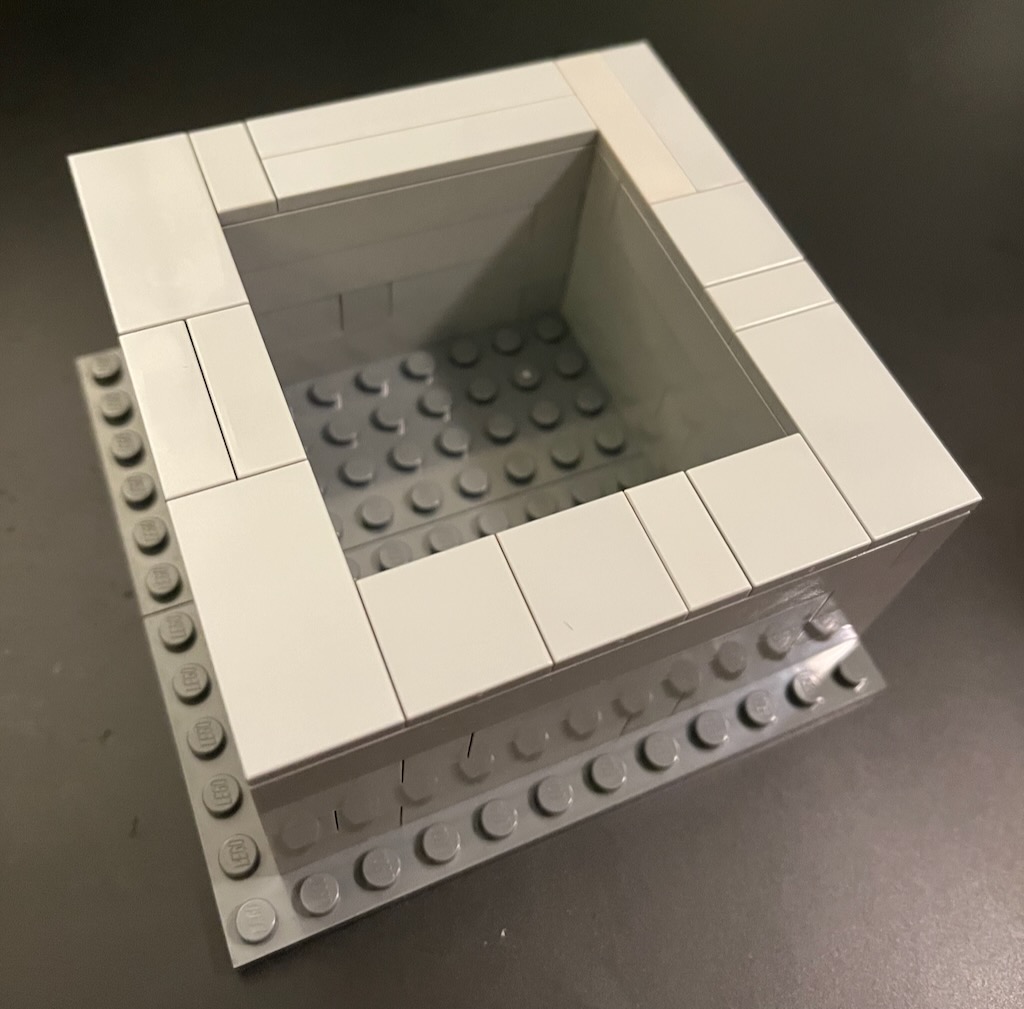
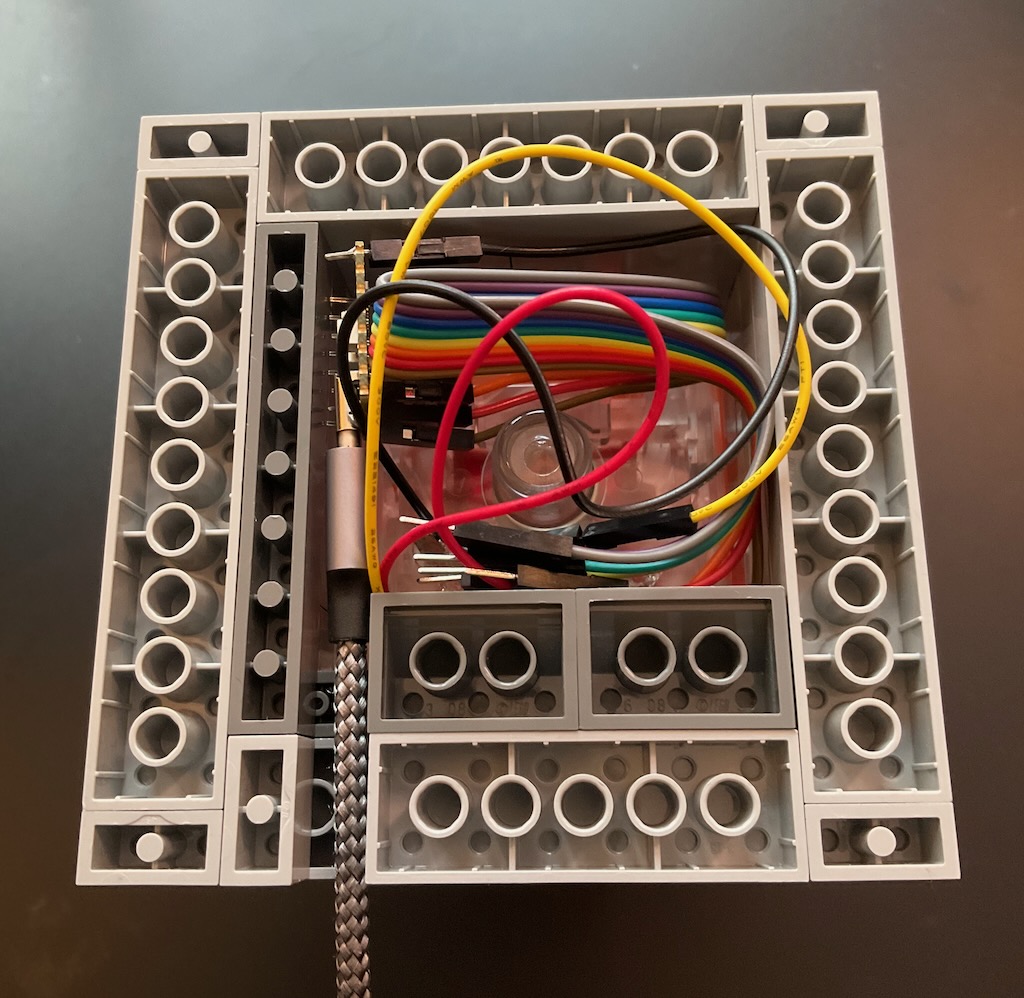
Apart from the Lego enclosure (scrounged from a decade or two of accumulated miscellaneous bricks), I needed a Big Switch, a microcontroller, and some way to wire them together.
part list
The easiest way, no solder needed, is to go to The Pi Hut and get:
-
a Pimoroni Tiny 2040 with pre-soldered headers
Leftpondians can get a similar package from Adafruit:
Adafruit’s jumpers are not as convenient as the Pi Hut’s: you’ll need to chop off the JST connectors and solder to the microcontroller.
You don’t need to get a super small dev board like I did: a Raspberry Pi Pico is 51mm long so it will fit inside a 7x7 lego stud compartment with room to spare, tho the USB plug will stick out.
mistakes were made
My plan was to use my existing collection of jumper wires to hook up the Tiny 2040 to the Big Switch. I decided to solder wires to all eight GPIO pins, in case I want to do something more complicated with it in the future, and because my jumper wires came in a rainbow ribbon.
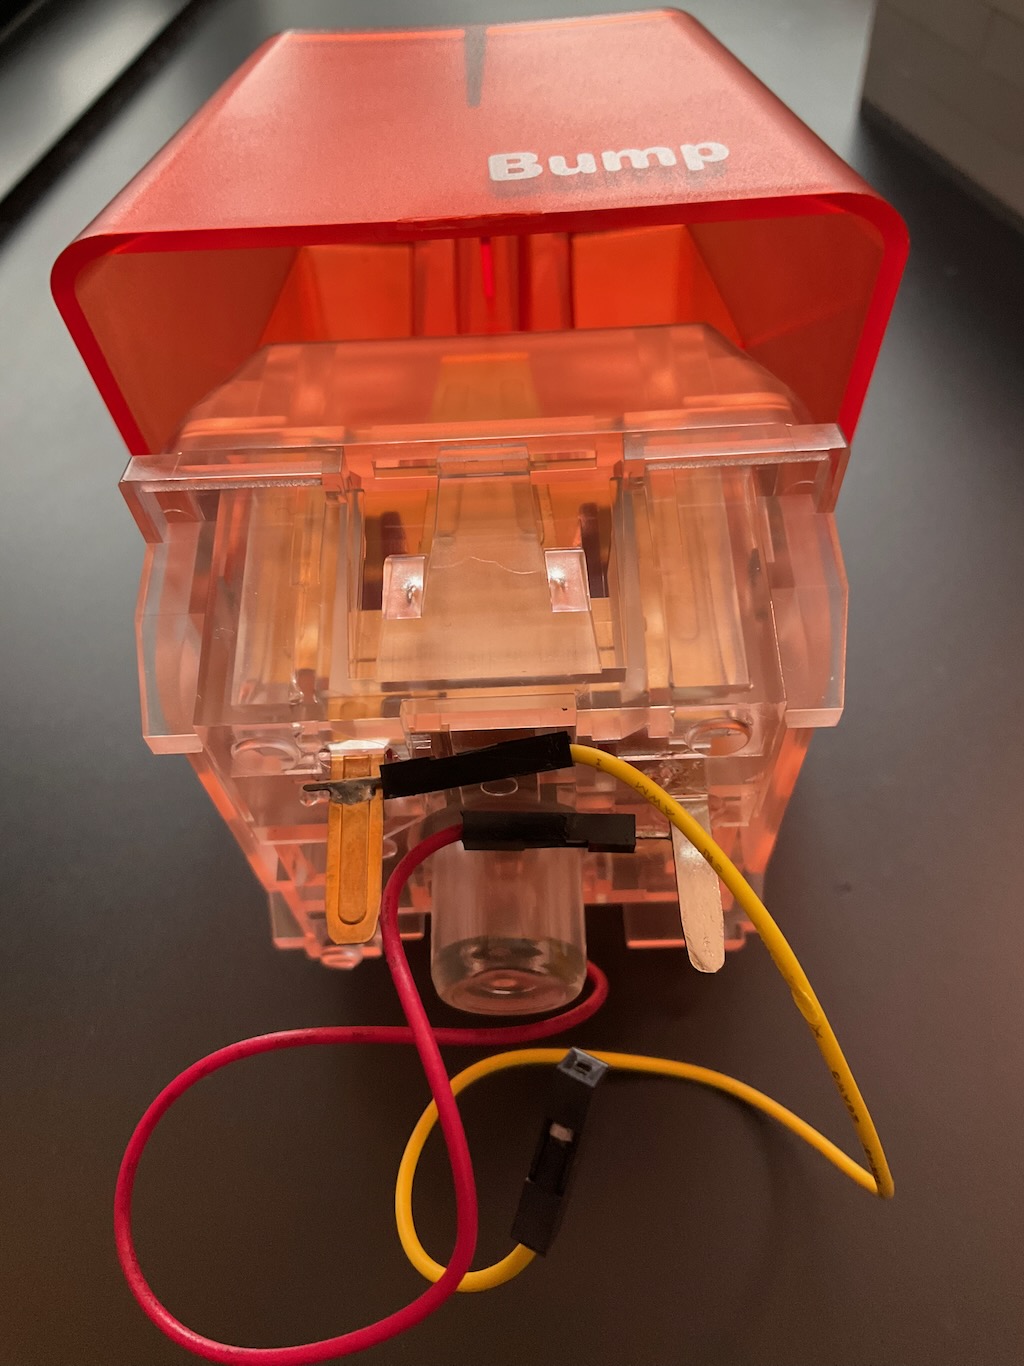
Unfortunately, soldering wires to the pins of the Big Switch was more difficult than I expected.
The pins are about 4mm wide and 13mm long. One of them is copper-coloured and relatively thin, and I soldered that connection without trouble.
The other is steel-coloured and thicker. The solder would not form a meniscus, it would just ball up and slide off. Eventually I tried roughing up the surface of the pin with a file, and the scratches were enough for the solder to grab hold.
Later on I found an Adafruit Big Switch build guide which uses spade connectors, so that’s what I recommend above.
firmware
I slapped together a Big Switch QMK configuration which maps
the Big Switch to ENTER.
The info.json file says the Big Switch is wired to GP0. You might
need to change this if you are using a different dev board; for
instance, GPIO0 is not broken out on the Adafruit QT Py RP2040.
done!
So now I have a comically huge button on my desk that I can whack dramatically when a command needs to be fired off with an extra flourish.