Colorize your CLI
Prerequisites: basic understanding of CLI and of common programs.
The Command Line Interface (abbreviated CLI for the rest of the post) is
the swiss knife of many developers and sysadmins out there. Unix systems provide
a settings layer that can be rapidly accessed using some CLI utilities.
And that’s just the tip of the iceberg. The CLI allows us to do almost everything without leaving the comfort of the keyboard. From browsing files and directories (using nnn or ranger) to reading and sending emails (using aerc).
However, most programs we use:
- disable colors by default, sticking to the same default since their initial
release. E.g.: ls and grep accept a
--colorargument for enabling colored output, or - do not implement colors at all, e.g., df
There are a lot of references on the web regarding this topic, like Color output in console page in the Arch Linux wiki and various Stack Overflow questions. They propose multiple solutions that sometimes overlap with each other. One must go through all the documentation, choose carefully and follow the installation procedure, and this can become tedious in a short amount of time.
In this post, we will setup a colourised CLI using the programs
described above. This will be a comprehensive guide and there will be (almost)
no need to read any documentation.
Please note that this is based on my personal setup, based on my personal preferences. Feel free to skip/change anything you dislike, as it won’t impact the rest of the guide.
Starship
This is what the bash prompt looks like out of the box:

The first step into our colored journey is to making this prompt both more meaningful and better to look at.
There are a lot of prompt plugins out there. However, most of them work only
in a single shell or require the installation of a framework like Oh-My-<shell>. What I have instead chosen is a shell agnostic prompt:
starship.
starship is a fast (really fast!) prompt written in Rust that works in all shells (including exotic shells such as Ion).

Let’s have a look at our new prompt inside a git repository:

starship is available in the following distributions. If your distribution isn’t listed, you can run:
$ curl -fsSL https://starship.rs/install.sh | bash
To enable it in bash, add the following to the end of ~/.bashrc:
eval "$(starship init bash)"
For enabling it in different shells, like zsh or fish, follow the
getting started guide
on the official site.
Generic Colourizer
Let’s take as example a well known and widely used program: df.
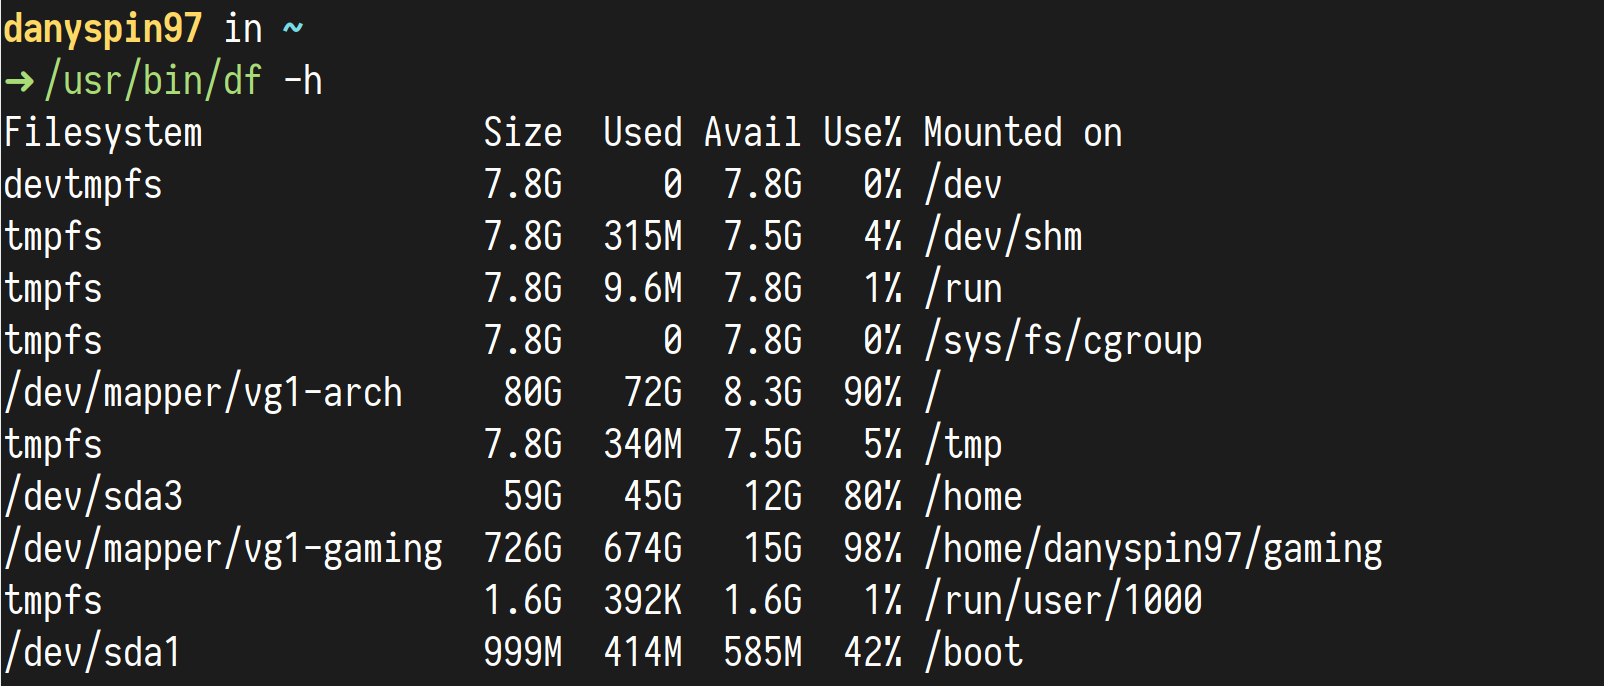
As you can see, it’s clear but plain and somehow hard to follow. Let’s use Generic Colourizer to improve its output:
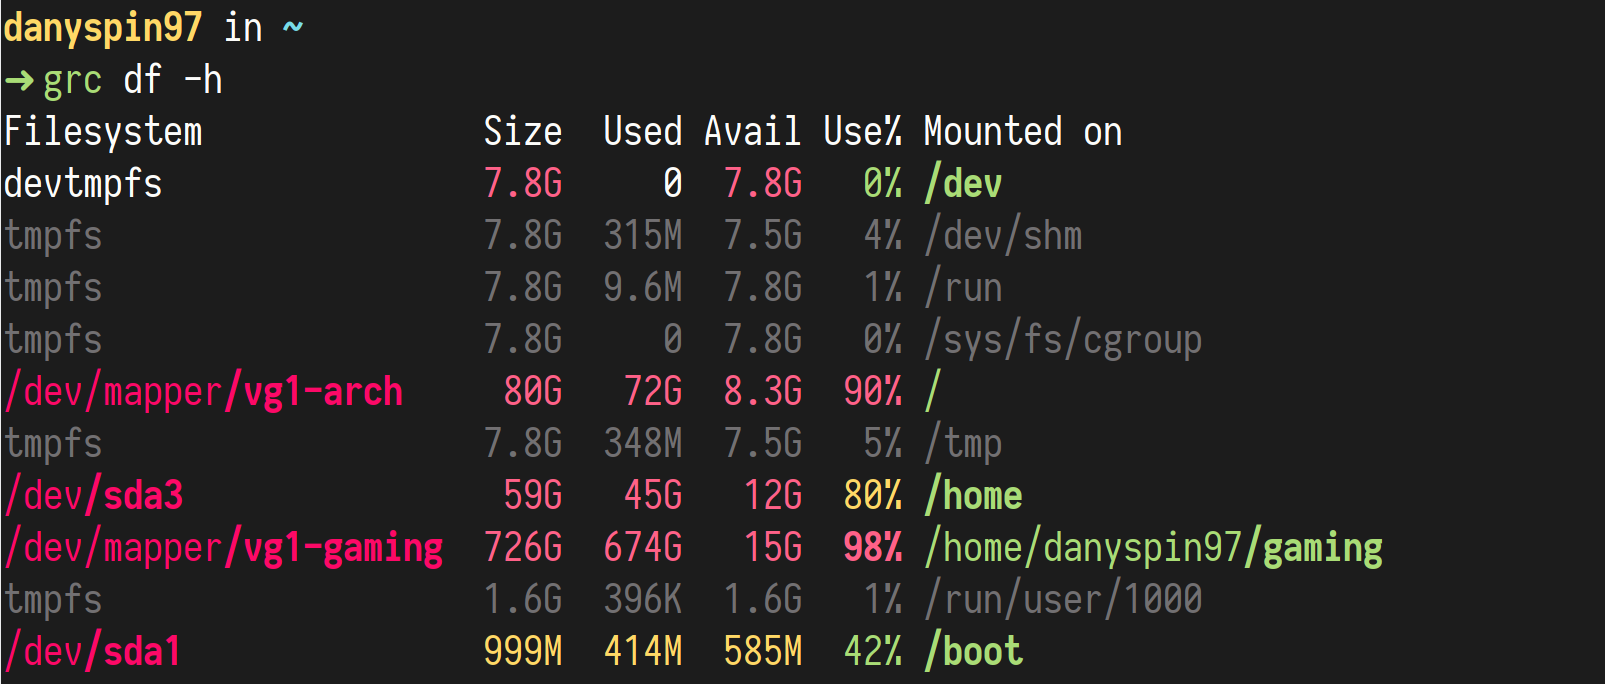
Now it seems like a total different program!
As we have just seen, Generic colourizer is a wrapper that uses regex to
add colors and modifiers (bold, italic) to a program’s output.
Among the supported programs there are id, env, sysctl and mount.
You can install it using the package manager, as it is available in almost every distribution.
To enable it in bash, add the following at the end of your ~/.bashrc:
[[ -s "/etc/profile.d/grc.bashrc" ]] && source /etc/profile.d/grc.bashrc
To enable it in zsh or fish, respectively source /etc/grc.zsh or
/etc/grc.fish.
These configuration files will add aliases to the supported programs. I.e.,
next time you run df, the shell will automatically run grc df.
ls
ls command is one of the commands that by default do not use colors, although
they are avaiable by using --color argument.
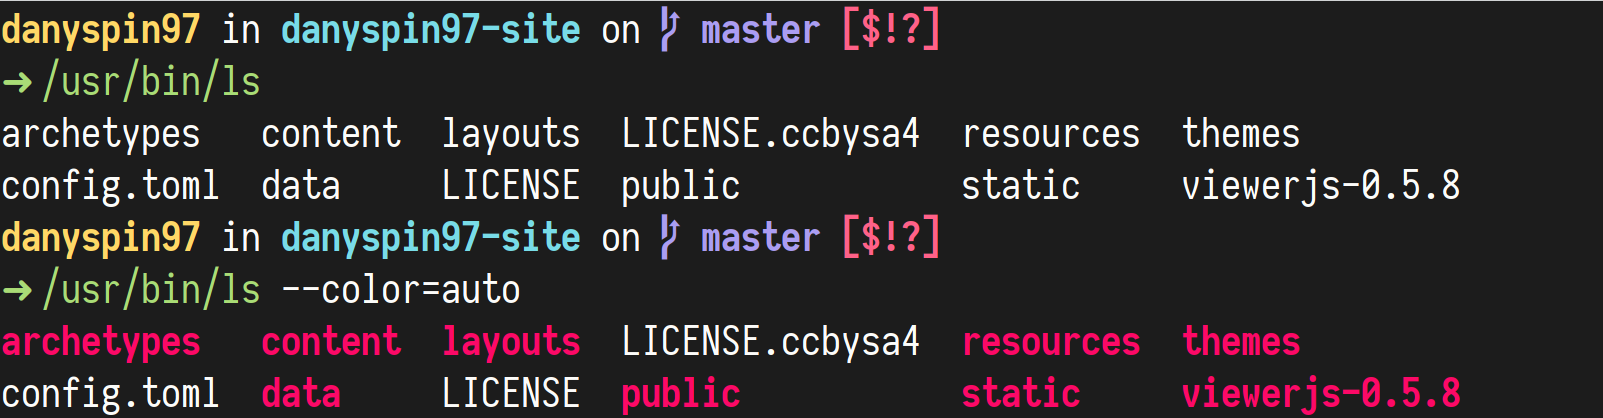
Simply add an alias in your config. For bash users, add the following in
your ~/.bashrc:
alias ls='ls --color=auto'
grep

As for ls, add an alias to grep --color=auto.
# ~/.bashrc

alias grep='grep --color=auto'
diff
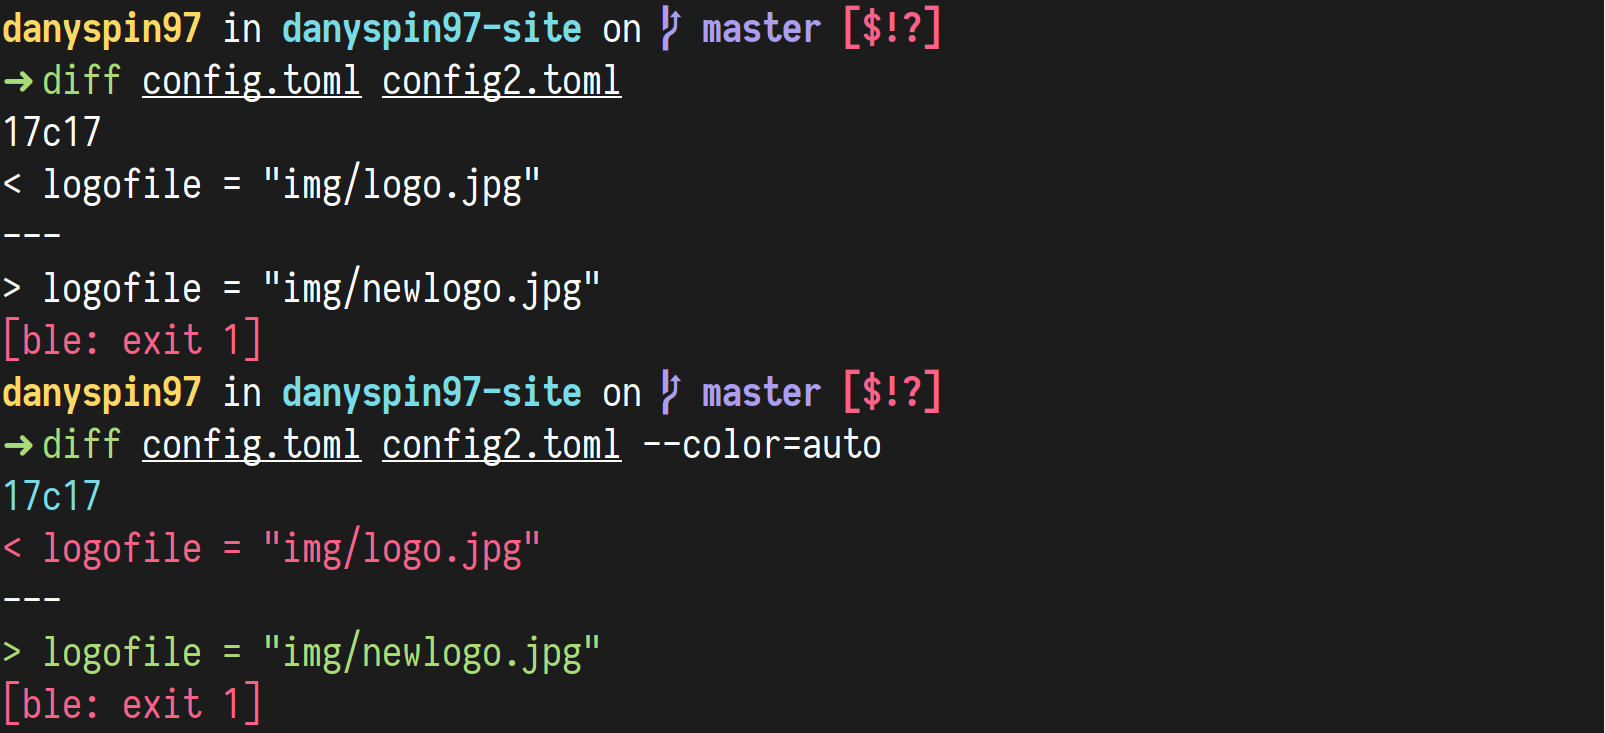
As for ls, add an alias to diff --color=auto.
# ~/.bashrc

alias diff='diff --color=auto'
man
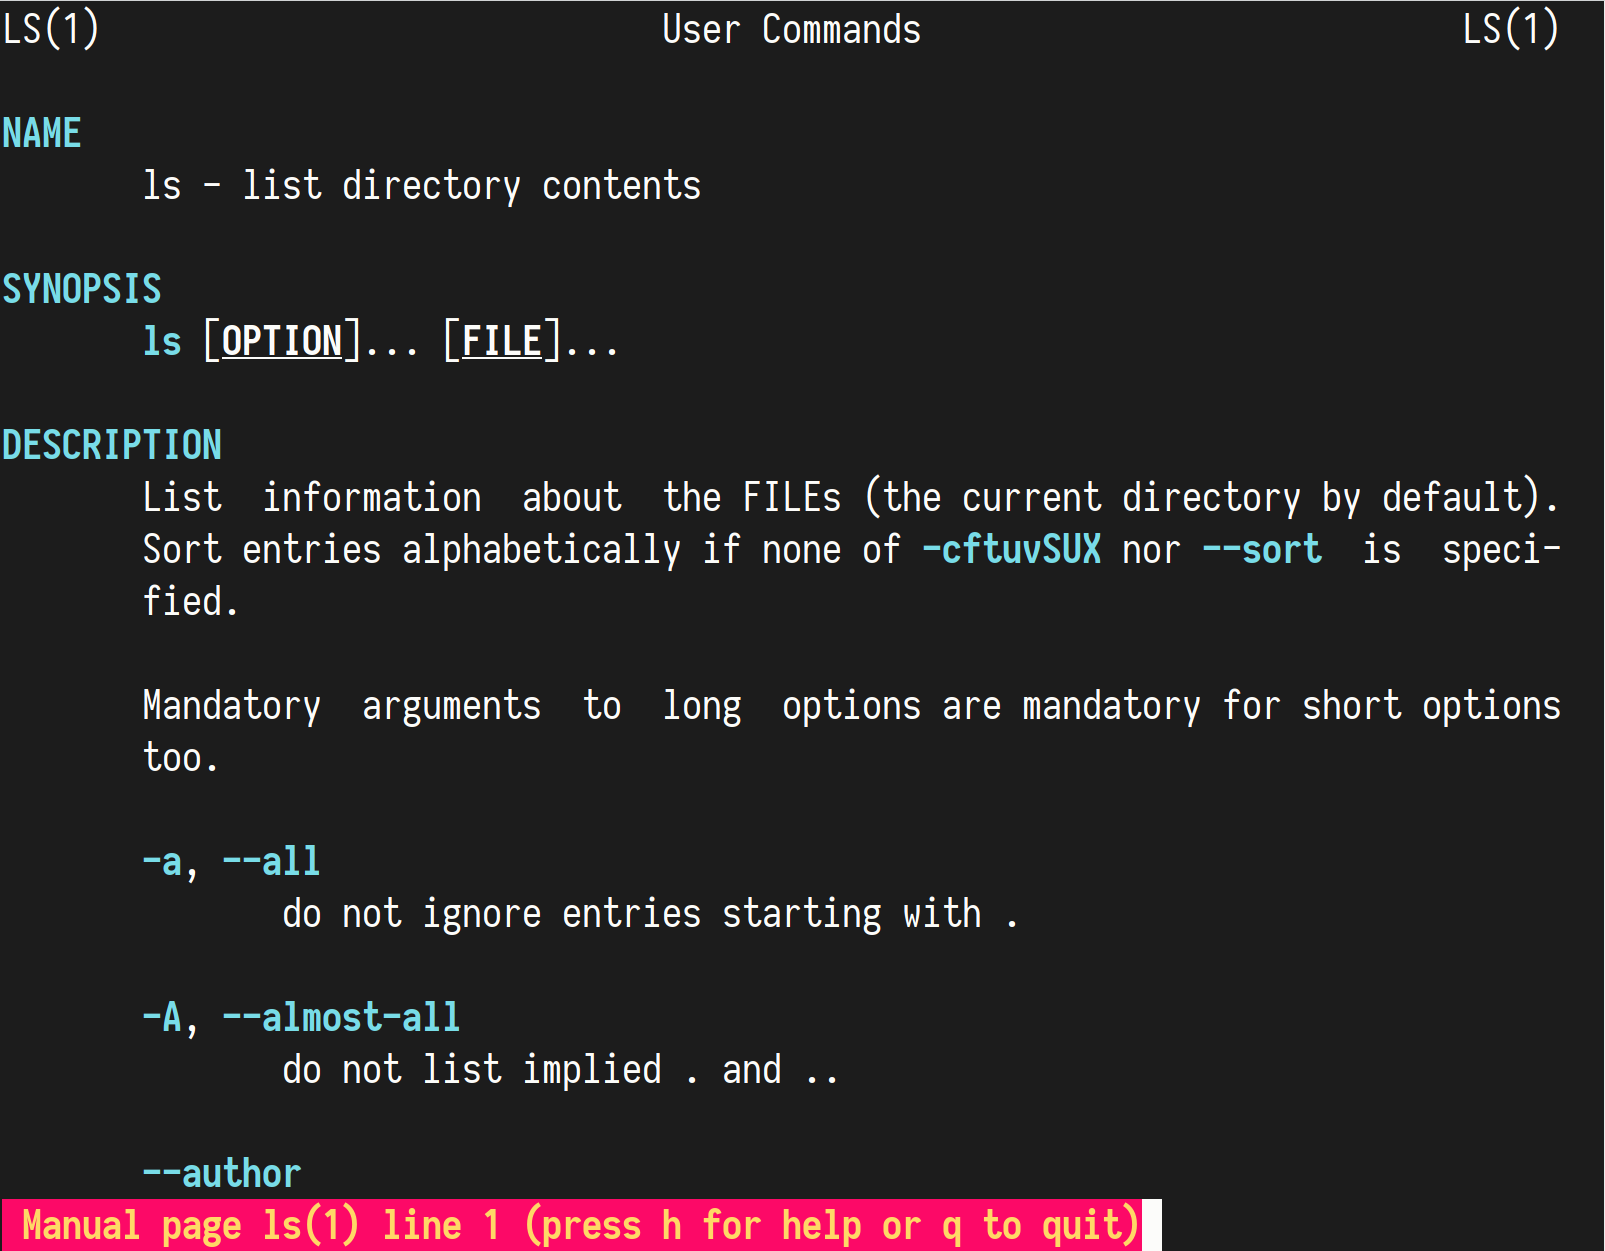
To add colors to man, we need to add colors to less. In bash, this can be
achieved by creating a file ~/.config/less/termcap with the following content:
export LESS_TERMCAP_mb=$(tput bold; tput setaf 2) # green
export LESS_TERMCAP_md=$(tput bold; tput setaf 6) # cyan
export LESS_TERMCAP_me=$(tput sgr0)
export LESS_TERMCAP_so=$(tput bold; tput setaf 3; tput setab 4) # yellow on blue
export LESS_TERMCAP_se=$(tput rmso; tput sgr0)
export LESS_TERMCAP_us=$(tput smul; tput bold; tput setaf 7) # white
export LESS_TERMCAP_ue=$(tput rmul; tput sgr0)
export LESS_TERMCAP_mr=$(tput rev)
export LESS_TERMCAP_mh=$(tput dim)
export LESS_TERMCAP_ZN=$(tput ssubm)
export LESS_TERMCAP_ZV=$(tput rsubm)
export LESS_TERMCAP_ZO=$(tput ssupm)
export LESS_TERMCAP_ZW=$(tput rsupm)
export GROFF_NO_SGR=1         # For Konsole and Gnome-terminal
And then in your .bashrc:
# Get color support for 'less'
export LESS="--RAW-CONTROL-CHARS"

# Use colors for less, man, etc.
[[ -f ~/.config/less/termcap ]] && . ~/.config/less/termcap
If you are using fish, add the following to your ~/.config/fish/config.fish:
set -xU LESS_TERMCAP_md (printf "\e[01;31m")
set -xU LESS_TERMCAP_me (printf "\e[0m")
set -xU LESS_TERMCAP_se (printf "\e[0m")
set -xU LESS_TERMCAP_so (printf "\e[01;44;33m")
set -xU LESS_TERMCAP_ue (printf "\e[0m")
set -xU LESS_TERMCAP_us (printf "\e[01;32m")In
set -xU LESS "--RAW-CONTROL-CHARS"
highlight
When reading a file using less, the output is the plain file, as we were
reading the file through cat.
This can be improved by by passing the file through highlight.
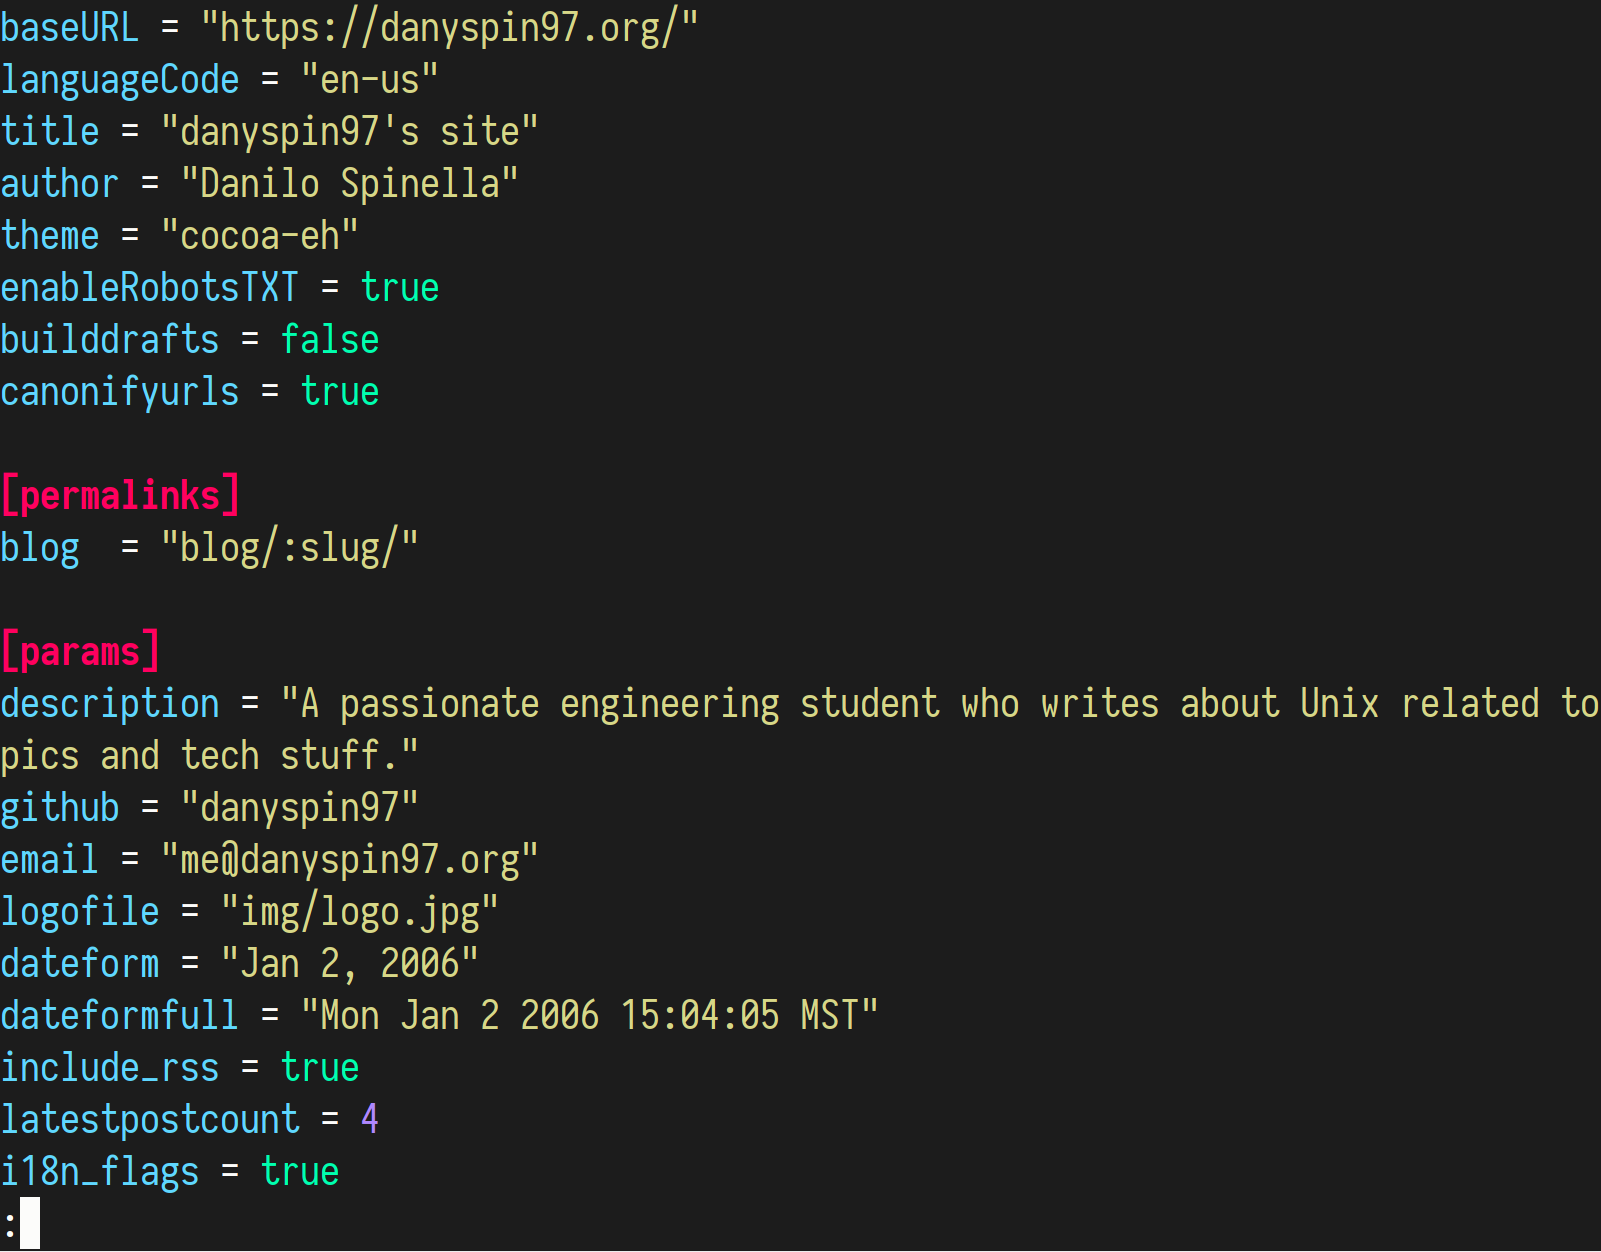
We now have syntax highlighting!
highlight can be found in almost all distributions. After
installing it using your package manager, add the following to your ~/.bashrc:
export LESSOPEN="| /usr/bin/highlight %s --out-format xterm256 --force"
By adding --line-numbers, highlight will also show line numbers.
You can also customize its style by adding --style <style>; for the
screenshot, the molokai theme has been used. Please read the
documentation
for further customizations.
Bonus for bash users: ble.sh
bash, contrary to its alternatives zsh and fish, does not have a
powerful line editing. By default the command you write won’t be highlighted
and the completion won’t be shown.


Bash Line Editor (also called
ble.sh) is a flexible plugin that makes bash closer to the other two shells.
Let’s have a look at the exact two situations above and the difference ble.sh
does.


To install ble.sh run the following commands:
$ cd /tmp
$ git clone --recursive https://github.com/akinomyoga/ble.sh.git
$ cd ble.sh
$ make
$ make install
ble.sh will be installed inside ~/.local/share/blesh.
Now add the following lines at the top of your ~/.bashrc:
[[ $- == *i* ]] && source ~/.local/share/blesh/ble.sh --noattach
And the following lines at the end of the same file:
((_ble_bash)) && ble-attach
Conclusion
After setting up the above programs/aliases you will have a different experience when using your CLI.
In this post we have mostly used common command line programs, although
modern alternatives exist, e.g., ripgrep as alternative to grep. Those
will be probably covered in another post.
Did you like the configuration presented through this post? Do you have other way of adding colors to your CLI? Comment below and let me know!
If you liked this post and want to support the blog, please donate!
